Vermicomposting
|
I am an artist and self styled nature lover with a passion for sustainable practices and environmental ethos. I have a home and studio in Biddeford Maine.
I've been keeping worms, also known as vermiculture, since 2007. To keep a worm farm you must ‘be the worm’ . Vermicomposting is a very easy and fun way to create rich ultra nutrient dense compost for your garden and house plants. My worms live happily right in my kitchen! One of my mantras is: ‘garbage is not trash’
I am passionate about this way of thinking and go even further by dividing my compostable materials three ways: worms first, chickens second, compost bin last. |
|
Check out my presentation on Worm Farming!
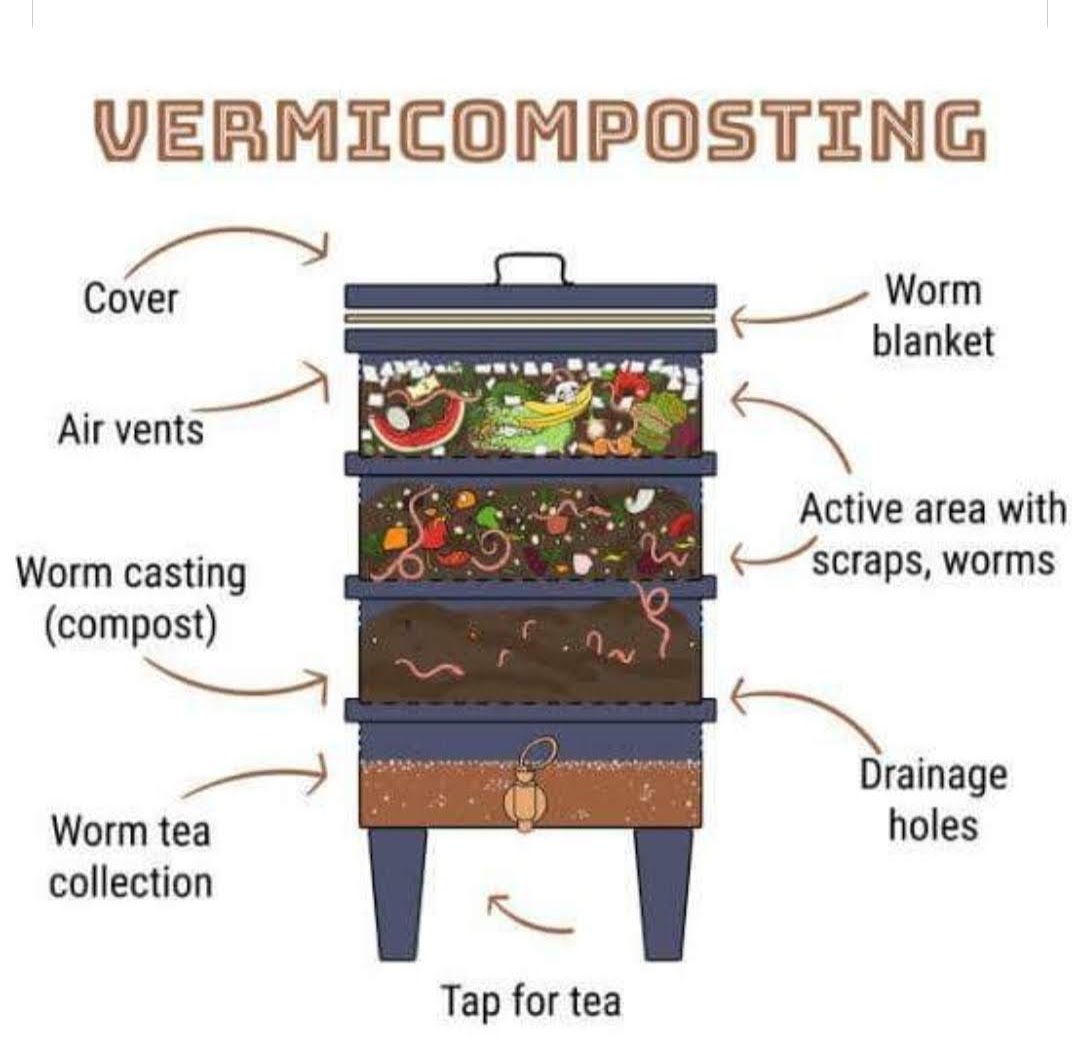
Introduction to vermicomposting
Vermicomposting is also known as worm farming. (Vermiculture is the process of breeding worms, vermicomposting is the process of turning organic debris into compost)
The most common type of worm used in vermicomposting is the red wiggler (eisenia fetida) Also known as tiger worm, branding worm or red worm. (European nightcrawlers and African nightcrawlers are also used in vermicomposting, but I have only raised red wigglers)
You typically want a pound of worms to begin your home worm bin. There are several commercially available worm bin systems, but you can build your own with readily available materials. See how here: https://www.youtube.com/watch?v=VD_dIpf1ZkI
You can purchase red wigglers through the mail for about $60/pound. Here are a couple of sources:
www.brotherswormfarm.com
www.urbanwormcompany.com
Red Wiggler Worm facts:
- Worms are animals and thus require animal husbandry
- Unlike earthworms, red wigglers are top feeders and do not burrow in the ground
- They can tolerate temperatures ranging between 32 to 95 degrees f, though optimum temps range between 55 and 80 degrees f
- Moisture is very important and should be maintained at 80%
- Ph should be neutral: 7.0
- They are hermaphroditic (meaning both male and female) though it takes two to tango:
- individuals have both female and male reproductive organs. They mate by joining their clitella and exchanging sperm. Each earthworm will form an egg capsule in its clitellum and pass it into the vermicompost 7 to 10 days later. The egg capsule is golden-brown and looks like a tiny lemon the size of a match head. Two to seven Eisenia Fetida babies will hatch from an egg capsule in 30 to 75 days.
- Worms are cold blooded animals and do not have lungs. They breathe through their skin and will die if dried out.
- Light can cause paralysis within 60 minutes
- Worms to not have eyes
- How do worms eat:
- Worms have tiny mouths and no teeth. They push the pharynx (throat) out, grab microorganisms and little bits of organic matter, and pull them into its mouth. The food is coated with saliva, pushed down the esophagus into the crop, and onto the gizzard, where it is crushed and ground apart. Next, it moves into the intestine, where food is broken down more by digestive enzymes. Some of the food is passed into the bloodstream for use by the earthworm and the rest passes out the anus as castings (worm poop).
- The number one problem people have with keeping worms is over feeding
- Red wigglers eat 25-35% of their body weight per day. A pound of worms will theoretically consume ¼ pound of food a day. You should wait to feed until they have consumed all of the prior food introduced into the worm bin.
- What to feed your worms: just about any type of food waste with the exception of citrus, which is too acidic, onion, which they typically don’t like, and especially no meat or dairy which they can not consume fast enough to prevent unwanted pests or odors. It is also important to add grit. I add pulverized egg shells.
- How to harvest your castings: after about 4-6 months you should be able to harvest your castings. There are several ways to do this:
- Manual Sorting Manually sorting thousands of worms from vermicompost is certainly possible – and most definitely tedious! I find this method meditative and easily spend hours harvesting my vermicompost this way.
- Bait Method By intentionally not feeding the worms for a couple weeks and then giving them a rich, quickly decomposing food like pumpkin on the surface of their bin, you can get the hungry worms to congregate near the moist food source.Wait 24 hours or so and simply skim the top 4-6 inches of worm-rich vermicompost out of your bin. What’s left won’t be pure worm castings as it is likely to have some unprocessed material in it, but that is perfectly fine.
- Light Method Worms are photophobic: they hate light. They will do their best to dig themselves back into darker environments. Place a pile of vermicompost on a flat surface under a bright light. Wait a minute or so as the worms work their way into the vermicompost to escape the light source. Scrape the top and sides until you encounter wiggling worms. Repeat until all you have is a pile of worms. To speed it up a bit, form an assembly line of vermicompost piles and work one pile at a time.
FMI: See Ronda Sherman’s webpage: https://composting.ces.ncsu.edu
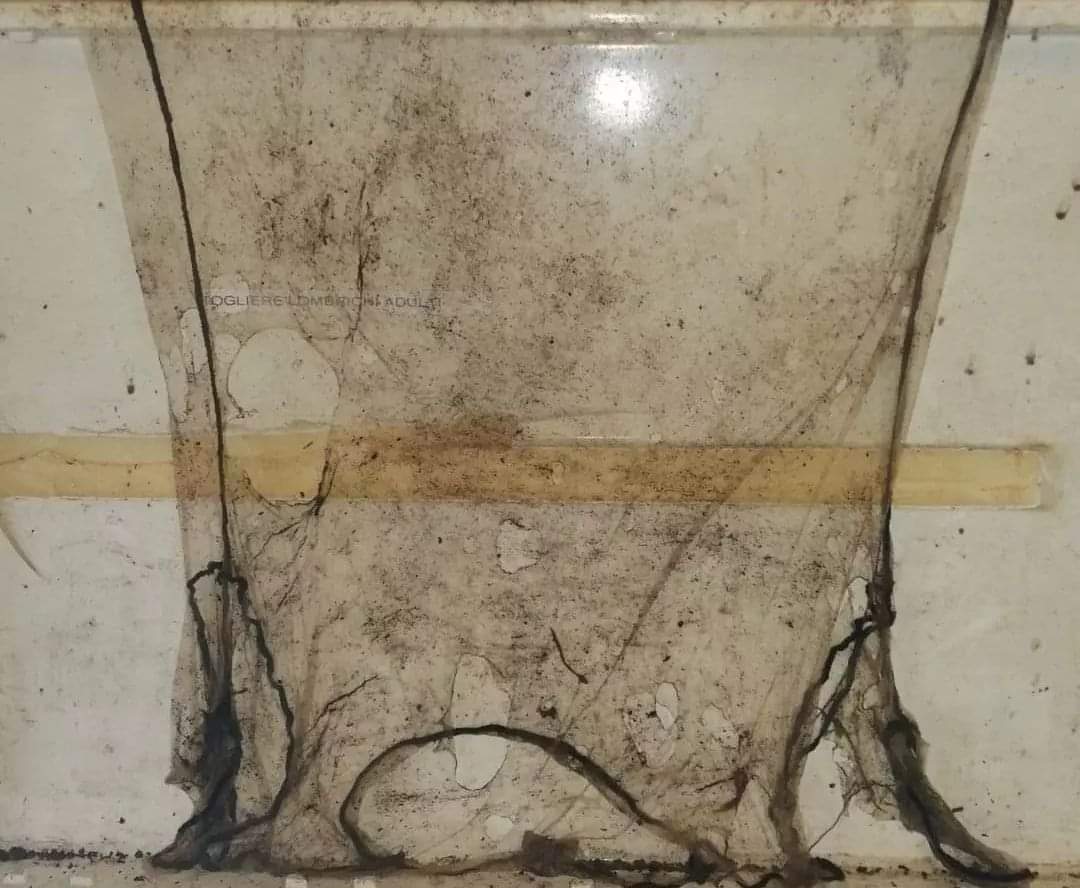
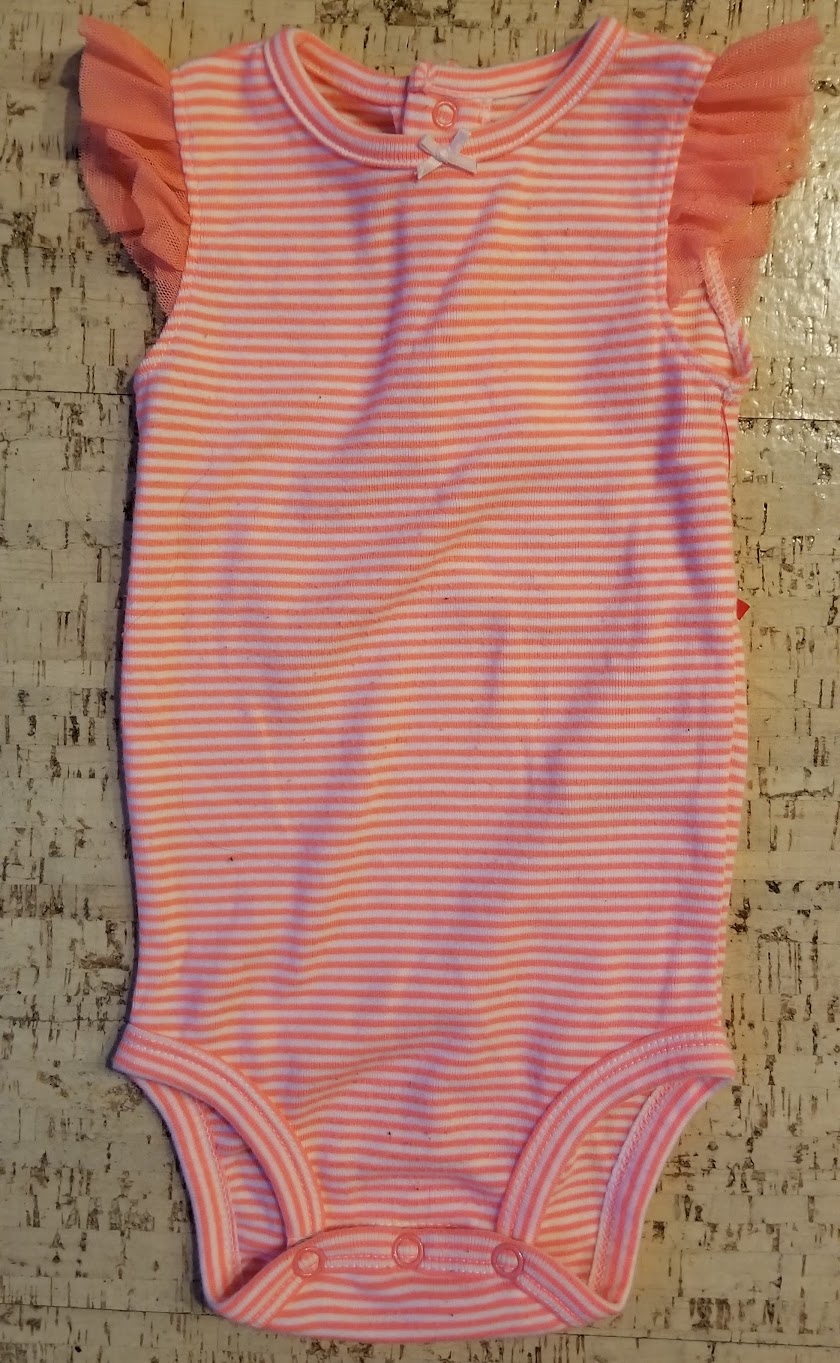
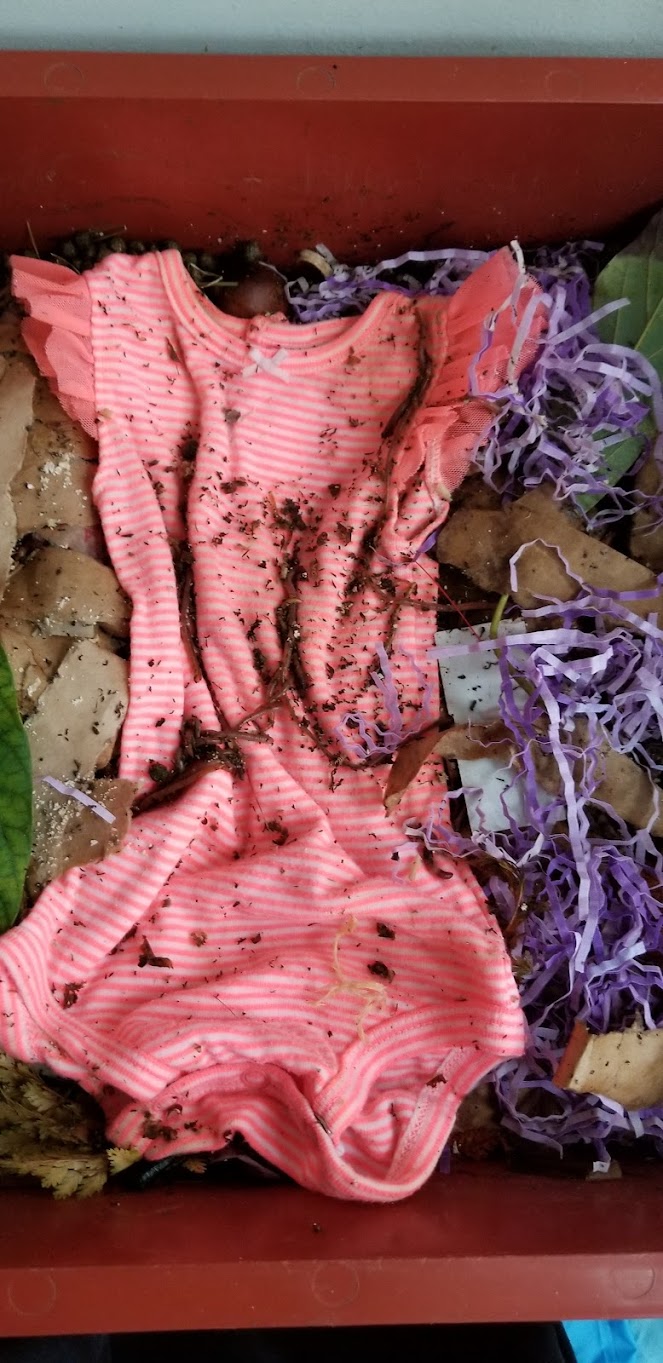
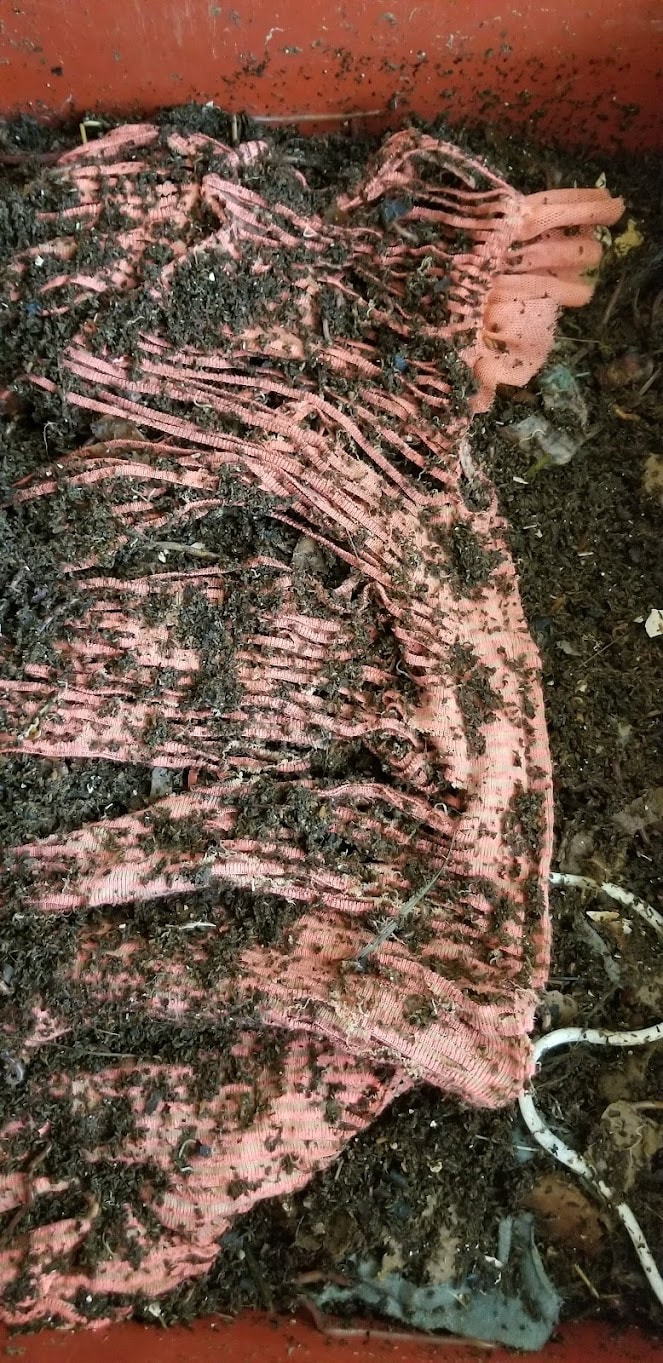
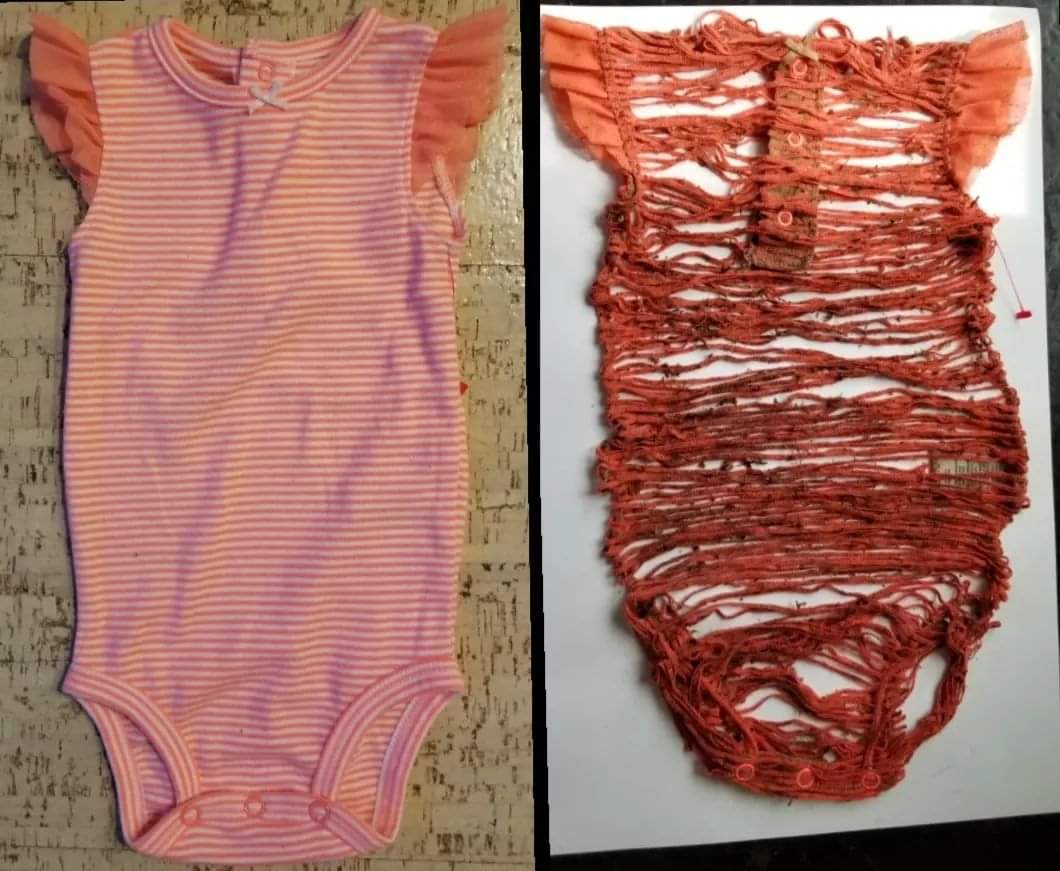
If there's one thing I love it's experimentation. A person on a Facebook worm farming group I'm in posted the coolest thing I've seen in a long while: a t-shirt he'd put in his worm bin for a number of months, (some people use fabric as a cover for their worms) All that was left of it was this ethearial, gossamer, synthetic, elastic skeleton. Of course,I knew I had to try this amazing experiment, so I went to Goodwill and purchased a pink and white striped onesie, and put it in my bin on 1/27/22. I removed it on 3/28/22. The results are astonishing! Looks like all of the white fibers were natural, ( worms will eat anything that was once growing) the pink must be synthetic. How cool!